Monday, November 23, 2009

Somebody Stop Me!

Those of us who love the old muscle cars have often been guilty of focusing so much on what is under the hood that we neglect other very important issues.  It is great to have twice the horsepower but it can really get hairy trying to stop the beast with 40 year old brake technology.  There is good news from the aftermarket, though, and disc brake conversions are not only cost effective but are literally a bolt on installation.


Remember how it used to be with an all drum system?  Anticipation was the watch word.  The Air Force calls it "situational awareness" - keeping your head way out in front of the car.  The problem was what do you do about life's little surprises like the person who backs out first and then looks.  We have become so used to disc brakes, ABS and short stopping distances on modern cars that we have forgotten just how bad the brakes were in the past.  I had a '69 Nova that never could stop quickly without pulling to the right.  I rebuilt every component and it was still a beast to stop.  In desperation I swapped in a junkyard front disc setup from a 396 Nova and that really helped but it took a lot of time finding a good donor back then; probably impossible now.


Now, back to the present.  Things have really changed.  You can purchase an aftermarket kit that has rotors, calipers, the master cylinder and the spindles for less than a grand and make that baby stop as good as it accelerates.  How much is your piece of mind worth?  I put a list of suppliers at the end of this article to help.  They are all first class and reasonably priced and the kit is actually engineered to provide a the balance and feel you might expect from a new factory performance system.


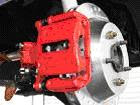
Some considerations.  If you want the best stopping power, you will have to upgrade the wheels and tires to something in the 17" range to get the larger discs and calipers to work - never fear, there are 11" systems that will work with your stock wheels.  Another consideration is if you want dropped spindles (lower ride height) in the front.  There are kits that use stock spindles, kits with aftermarket spindles and kits with aftermarket dropped spindles.  Another question is power brakes or non-power brakes.  Below is a representation of a premium power kit for a 1968-74 Nova.


The rear disc kit is pictured at the right.


Once you have decided on the kit that is right for you, get out the tools and go for it!  Here are the generic steps:


1.  Start by removing the cotter pin from the ball joint that holds the tie rod to the steering arm - remove the castle nut.  Next remove the shock.


2. Separate the tie rod from the steering arm; use a pickle fork if you have one, if not, a few persuasive taps from a trusty ball peen usually works.


3.  Next remove the spindle by removing the cotter pins from the upper and lower ball joints; loosen the castle nuts but do not remove them because the spring is still compressed.  Safety is real important here, that spring has enough stored energy to severely injure anyone in the way.


4. Put a floor jack under the lower A-arm and use it to slightly compress the spring.  Once this is done remove both the castle nuts and a couple of taps by the ball peen should break the ball joints loose.  Next, after you put a safety chain through the spring, slowly lower the jack and the spring tension will be released in a safe manner.


5.  Once everything (don't forget the brake line) is undone, the spindle and drum come right off.


6.  Now that you can access the suspension components easily, check the condition of the ball joints and look for play in the A-arm bushings; might as well fix it right while you have it partially disassembled.


7.  This drop spindle was part of our kit to upgrade the stopping power and give it a little more aggressive stance.


8.  Now you just reverse the process using your floor jack to add a little tension to the spring until the ball joint stud threads are through the spindle mounting holes, then screw on the castle nuts and install the cotter pins.


9.  Now install the steering arm on to the back of the dropped spindle.


10.  Now that everything is back in place it's time to install the new brakes.  Pack the wheel bearings.  It is probably wise to spend the dough for new bearings just to be sure.


11.   Tighten the castle nut to manufacturer's specs.
.


12.  Install the caliper bracket.


13.   Install the rotor.


14.  Install the caliper and attach the brake line.


Now, how about those rear discs?  This job takes a little more effort than the fronts because you have to remove the "C" clips from the differential and pull the axles, but hey, you wanted to change the rear lube anyway - right?  All kidding aside, it is the perfect time to add that finned aluminum or chrome differential cover.


1.  Pull the rear end cover, remove the C-clips, then remove the drum assembly and the axle. Also remove the brake hard lines and rear e-brake cables.


With the axles pulled, we could now bolt on our new caliper bracket and reinstall the axle. Make sure to check your axle bearings for wear.


You can now reinstall the axles and slap on the new rotor; use a couple of lug nuts to hold it in place.


Those new calipers sure look sexy!  It is an easy bolt up to the brackets you just installed.


The last thing to do is install the emergency brake cables, bleed the brakes and start enjoying that new stopping power!


Some useful resource links:
Tire Rack- Revolutionizing Tire Buying Since 1979


PT: SAVE UP TO 75% on OEM Replacement Auto Parts


Auto Parts Warehouse

Wednesday, October 28, 2009

Lower Ride Height the Right Way


So, you have the power train squared away and the paint is done, now you want it to look low and mean on cruise night. Getting the right stance for the street isn’t difficult if you follow a few simple methods for lowering the ride height. We are talking muscle cars with stock suspensions here so I hope you aren’t looking for advice on a low rider.
I always like to go the simple route first so we won’t be talking about the expensive stuff here either, just some relatively easy mods to the stock suspension to drop the height conservatively so it looks good, rides good and doesn’t hang up on every speed bump in town. You'll find that a correctly lowered vehicle not only looks better, but will also provide much better road feel and have minimal body roll. Conversely, an improperly lowered vehicle will not be fun as a daily driver, and more importantly, it may be dangerously unpredictable on rough pavement. So if you've ever thought about dropping your chevy muscle car, read this guide to achieving a functional in-the-weeds stance.


Let’s start right at the most basic element of the suspension. The factory springs are a compromise meant to satisfy a wide range of drivers and ride heights of 60’s muscle cars were much taller than the new hardware on the road today. We’ll fix that! We have advantages today undreamed of back in the day. The aftermarket has lowering kits that provide you with all the components needed to drop the height in reasonable increments. Assuming you really want to drive the car on normal highways and streets, you will want to avoid getting too radical; usually 2 to 4 inches of drop make a tremendous difference in how the car rides, handles and looks on the street.


A discussion about springs is in order. Spring rates are generally rated in pounds per inch (lb/in), which represents the amount of force required to compress the coil spring by 1 inch. For example, a 200 lb/in spring will compress 1 inch under a load of 200 pounds. Spring load is the amount of weight that a coil spring can support at any given compressed height. A 10-inch-tall spring at free height with a 200 lb/in rate compressed to a height of 6 inches, would be supporting 800 (4 inches X 200 lbs per inch) pounds at that height.

A cheap alternative for lowering is to cut the spring. We are talking coils here; if you want to try this I suggest you make your cuts with an abrasive cutoff saw (a wet saw if you can get your hands on one) and only cut ¼ of a coil at a time until you are satisfied with the ride height. Never, ever use a torch to cut a spring and under no circumstances should you heat a coil spring to lower its height. The heat changes the metallurgy of the steel and ruins the spring. Cutting and reinstalling and removing and cutting and reinstalling is very tedious and time consuming but if you have a lot more time than money it can work if you are careful.

Safety tip: always use a safety chain when removing a coil spring – they have a tremendous amount of stored energy and can inflict serious injury if they are allowed to fly out unrestrained. Support the car with jack stands, use a floor jack under the A-arm to compress the spring, remove the ball joint and slowly lower the A-arm with the jack.


Leaf springs are a different case. Many aftermarket manufacturers make leaf spring sets designed specifically to lower the vehicle in precise increments and are a bolt-in proposition. Spring shops can also de-arch a set of stock springs to lower the car; a viable and cheaper option. Spacers are some times used to drop the ride height and are very cheap but beware that they can also induce wheelhop under acceleration because they stress the spring and create a lever effect in the spring action. If you use spacers, do not exceed 1” in drop.

We have stayed within the basics of the stock suspension and really only ventured into some very simple changes regarding spring heights to lower the car’s center of gravity, improve its handling and increase the road feel. For the cost of a few Benjamins and a few hours with the tools you can have just the look you want for cruising while creating a good handling street machine. Do your research, plan your mods and put that machine in the weeds!
Shop Advance Auto Parts
September Featured Sale - JC WhitneyStreetSideAuto.com

Tire Rack- Revolutionizing Tire Buying Since 1979


Shop for Eibach springs and spring kits at Tire Rack.
Shop for Hotchkis Sport Suspension at Tire Rack.

Sunday, October 18, 2009

Chevy Muscle Car: Make it Handle


 I was so proud of my “sleeper” ’69 Nova.  I had taken a 4-door six cylinder, powerglide machine and transformed it in a real beast by grafting in a 1970 Corvette 350 L46 with a turbo hydra-matic.  What a junkyard find that was!  Trust me, a friend at the local wrecking yard was invaluable to this project and I got the engine and tranny at a great price.  I was very happy with the 350 hp the Vette engine added and it really transformed the Nova; 8 lbs. per hp can add a great deal of enjoyment to your street ride!  I had a lot of fun with that car – it was my first hot rod.  I guess you could have called it a homemade Chevy muscle car.


It did not take many miles to realize that although my creation accelerated like a banshee, it was a real handful in the corners and the brakes (drums) sucked.  Back to the junkyard and I made a deal for some discs from a big block Nova donor car – a real safety improvement.  Now for the handling issue.  Basically, my amateurish efforts were mediocre by today’s standards but the heavy duty shocks, firmer springs and sway bars teamed with some Goodyear radials made a tremendous difference.  It felt tight and glued to the road. For the 70’s it was about as good as you could get. 


Now, let’s fast forward to today.  Let’s say you are building a muscle car street rod like the Nova and you want it to handle as well as scorch the ¼ mile.  Here are some ideas about how to improve the suspension without breaking the bank.


First, get the best tires you can afford.  That means tires meant to handle so stay away from the semi-race bias ply tires; they look great and really hookup but they aren’t meant for corners.  Get a set of slicks for the drags if you are into straight line speed.   Four brands of very good summer tires (meaning not intended for near freezing temperatures or driving in snow and ice) are the Continental Extreme Contact DW, Goodyear Eagle F1 Asymmetric, Michelin Pilot Sport PS2 and Pirelli P Zero.  All have excellent dry and wet traction and perform well in road course and slalom testing.  In testing of 225/45R17 tires for ride comfort, dry and wet traction, lateral grip, steering response and road feel there was very little quantifiable difference in these four tires.  The ranking was:


1.      Michelin Pilot Sport PS2


2.      Goodyear Eagle F1 Asymmetric


3.      Continental Extreme Contact DW


4.      Pirelli P Zero


The difference between first and last ranking score was 7.48 to 7.45 so any one of these is an excellent street performance tire. 
TIRERACK.com - Revolutionizing Tire Buying
performed this testing in June of 2009 on both a 6.6
loop of expressway, state highway and county roads and a 1/3 mile test track course that includes 90-degree street corners, lane changes and simulated expressway ramps. Run in both dry and wet conditions, the test track allows evaluation of traction, responsiveness, handling and drivability normally only encountered during abrupt emergency avoidance maneuvers or competition events.  Check out the full report at: http://www.tirerack.com/tires/tests/testDisplay.jsp?ttid=120.


Next, shocks.  Things have changed since the 70’s when heavy duty was about the best you could do.  Shocks determine the rate of weight transfer by damping the motion of the spring and optimizing weight transfer is what good handling is all about. The shocks essentially control how the suspension operates, and you can't achieve the ideal damping for your combo without an adjustable shock. Next to tires, the shocks are the most important components of the entire suspension.  Double-adjustable shocks allow independent damping of both compression and rebound. Some single-adjustable shocks change the damping of the compression or rebound, but not both, while others change the compression and rebound action at the same time in equal amounts. Double-adjustable shocks allow very quick adjustments for fine tuning your suspension and are your best choice.


Springs:  Springs come in many forms - coils, leaves, torsion bars, or air bags. Springs primarily support the weight of the chassis, but also allow the tires to follow the contours of the road while providing roll stiffness in the corners.  Perhaps the most important aspect of spring design is its spring rate, which is different from spring load. Spring rate is simply how much force it takes to compress a spring one inch. For instance, a 200-lb/in coil spring requires 200 pounds of force to compress 1 inch. Spring load, on the other hand, is how much weight a spring can support at a given height. Spring rate does not change as a spring compresses but spring load is reduced. The more a spring is compressed, the less weight it can support. A shorter spring must have a stiffer rate than a taller spring to support the same weight.


Linear-rate springs are found on most production cars and race cars. Some aftermarket springs have a progressive rate, which means that they get stiffer as they compress. This design initially provides a softer rate to improve ride quality, then stiffens up the more it's compressed to limit body roll.  The theory is good, but with a variable rate spring, the shock valving must account for a wide range of spring rates, which can adversely affect ride quality and handling. A progressive spring rate can unnecessarily complicate fine-tuning the suspension.  When matched with the right shocks, a linear-rate spring can ride and handle better than a variable-rate spring so be wary of the benefits of progressive rate springs. 


Most passenger car spring rates are pretty soft so a good rule of thumb is to increase the spring rates about 30%; if the vehicle has the optional “heavy duty” suspension option and a firm ride, try some of the other modifications mentioned in this article before you pop for new springs.


Yep, sway bars.  Sway bars help resist body roll by increasing roll stiffness; this is done by attaching the left and right sides of a car's suspension together and anchoring them to the frame.  In the front suspension, the sway bar anchors the lower control arms to the frame. In the rear, the sway bar usually attaches from the rearend housing to the frame. As a car's body begins to lean in a corner, cornering loads twist the sway bar. Consequently, it is the bar's torsional stiffness (resistance to twisting) that determines how much the body roll is reduced.


The three primary factors that determine a sway bar's torsional stiffness are (1) its diameter, (2) swing arm length and (3) whether it is of solid or hollow construction. In regards to sway bar diameter, stiffness increases the bigger the diameter.  Small increases in diameter substantially increases bar stiffness so be conservative when selecting a bigger bar.  A 32 millimeter bar is 70% stiffer than a 28 millimeter bar!


Changes in swing arm length dramatically impact sway bar stiffness as well. The swing arm is the portion of the sway bar that extends from the frame to the control arm or rearend housing. Lengthening the swing arm reduces sway bar stiffness, while shortening it increases stiffness.  Shortening the bar’s swing arm from 10 to 5 inches results in a sway bar that's twice as resistant to twisting. 


Is a tubular sway bar less stiff than a solid bar?  In reality, a tubular sway bar can be just as stiff as a solid bar for any given diameter; the wall thickness is the critical parameter. A tubular sway bar is also lighter than a solid bar and tends to flex back to normal faster when twisted.  Less weight and faster response makes the tubular bar a good choice.


Roll Stiffness.  Here is a discussion on how to make the springs and sway bars work in harmony.  If optimizing handling is all about controlling weight transfer and body roll, then proper roll stiffness is your target. Roll stiffness is simply a suspension's resistance to body roll and is determined by the stiffness of the springs and sway bars. Some prefer using stiffer springs and smaller sway bars, while others prefer softer springs and stiffer bars. There is no clear consensus as to which setup is best.  Stiff springs and small sway bars allow the left and right sides of a suspension to perform more independently from each other, but compromises ride quality.  Soft springs and stiff sway bars preserve ride quality, yet detract from a suspension's side-to-side independence.  A number of suspension experts prefer the soft springs and stiff sway bars approach simply because stiffer springs deteriorate ride quality and are not necessary if you select a good balance with the sway bars and shocks.  For good street handling and decent ride quality, the suggestion here is easy on springs rates and very firm on roll bar stiffness.


Another tip.  Deflection in the bushings can harm suspension geometry and limit the rear suspension's ability to put the power down. Although they transmit the most noise and require regular lubrication, Heim joints virtually eliminate deflection, and they also enable the differential to articulate from side to side to reduce suspension bind.


What we have discussed here should help you significantly improve your muscle car’s handling.  Purposely, there was no attempt to go beyond what can be accomplished with simple hand tools and a reasonable budget.  We have assumed your suspension is stock and in good working order as a starting point.  Many aftermarket suspension suppliers offer packaged kits of springs, shocks and sway bars that are cost effective and easy to install.  Do your research and twist those wrenches, the result in street handling will make your Chevy muscle car even more fun to drive! 


Tire Rack- Revolutionizing Tire Buying

Haynes 10345 Suspension, Steering & Driveline Haynes Techbook


Auto Parts Warehouse
Parts Train

Friday, October 9, 2009

Porting and Polishing Chevy Heads


The heart of your chevy muscle car engine is the cylinder heads.  A time-honored method for increasing chevy muscle car horsepower and torque has been improving the air flow potential of the engine cylinder heads. There are many ways to do this; expensive "bolt–ons" such as aftermarket heads, supercharging or turbo charging. For the real gearhead with little money and basic mechanical skills, porting and polishing the OEM heads is always an option.
With just a few key modifications, most heads can be made to flow 5 to 10% better than stock and the effort only requires a few basic tools, patience and a weekend’s worth of sweat labor. That’s free horsepower! If you are doing a valve job anyway, especially if upgrading to larger valves, this improvement could be in the 20 to 25% range.

The Basic Steps Are: 

1. Remove ridges from the intake and exhaust port bowls; this is formed when the valve seats are cut and once the heads are disassembled you can easily feel it with your finger; it's in the head just below the seat. Blend the ridge into the port walls using a carbide burr with a ¼ inch die grinder. A variable speed grinder and a light touch are best. Be very careful that the shank of the burr does not come in contact with the valve seat. Remove as little material as possible. The entire port should feature a continuous smooth radius. The valve guide bosses can also be cleaned up but be sure to leave .125 of material surrounding the valve guide hole. You can use abrasive rolls to polish the exhaust ports but do not polish the intake ports.  With the intakes, too smooth and you lose the turbulence needed to thoroughly mix the gas and air being pulled into the combustion chamber.


2. Unshroud the valves by gently removing material from the sides of the combustion chambers. Match the head gasket with the bolt and dowel-pin holes in the head and then scribe a cylinder-bore line around the chambers. Using machinist bluing or a dark felt tip marker will make the scribe line easy to see. You then know how far you can safely grind but do not go outside the scribe line or serious sealing problems may result. Again, remove minimal material to avoid reducing the compression ratio. Use some old valves in the chamber to protect the seats while grinding. You can also polish the chambers with abrasive rolls; it will reduce the tendency for carbon buildup.


3. Port match the intake runners to the intake using the intake gasket as a template for a scribe line. Some say this is worth 4% more CFM, 2% is more likely, but every little bit helps.   Do not polish the intake runners or fuel puddling and loss of flow turbulence could result – leave them a little rough.


Tools Needed:
• Variable speed die grinder with 25,000 rpm potential; an air grinder is ok but an electric with variable speed control seems easier to modulate
• Carbide burrs; ½ inch head and some smaller sizes for tight spots all with 2 inch long shanks

• Abrasive rolls (basically medium to fine grits, try to stay below 1/2 inch diameter)
• Leather gloves
• Ear plugs
• Eye protection
• Dust mask
• Duct tape (wrap the grinder tightening nut and tape around the combustion chamber scribe line just in case); running a burr across an unprotected head surface will ruin your whole day – the duct tape offers a little extra protection.

Key Learning: A valve job will be needed after this process because I have never seen anyone port and polish heads without nicking at least a few of the valve seats, no matter how careful they were - so plan accordingly.

Your chevy muscle car can really benefit from this "sweat labor" modification. Do this right and you can feel the added power and torque in the seat of your pants - improves gas mileage too!  The products listed below can help you in your quest for greater performance.


More detailed information can be found at: http://www.chevyhiperformance.com/techarticles/95518_small_block_cylinder_head_porting/

Thursday, October 8, 2009

1965 Chevelle Z16 Big Block Option


In 1965, with the introduction the new lineup of Chevy muscle cars, it was clear that the Chevelle was a packing a major performance punch. The new L79 350hp 327 V-8 had enough power bring a serious challenge to any Ford pony car.  To really play in the big leagues of muscle cars, Chevrolet upped the ante and really made the Chevelle a true Chevy muscle car with the option known as the Regular Production Order (RPO) Z-16, known as the Chevelle Z-16. The Z-16 package equipted the Chevelle with an L37 396 big-block that cranked out 375 hp at 5,600 rpm and 420 lb-ft of torque at 3,600 rpm.

You may have noticed the 396 only boasted 25 more horsepower than the L79 327.  It's rumored the motor was seriously underrated.  Every Z-16 was equipped with a Muncie four-speed, and you had three colors to choose from: tuxedo black, regal red, and crocus yellow; the vinyl top was optional. The Z-16 had special trim and emblems on the rear, and the Malibu SS emblems were moved to the fenders. To strengthen the structural integrity, Chevrolet built the car around a stronger convertible frame with rear reinforcements and two extra body mounts.


Other features included 11-inch drums, power-assisted brakes, front and rear sway bars, and more.  In 1965, the Z-16 was close to being a true production drag car.  Chevrolet never intended on producing mass numbers of the Z-16 option due to limitations (at that time) in producing the volume; they didn't even advertise the option.  Many Z-16s were used as dealership promotional vehicles to develop an image for the Chevelle. However with a car like this, it's hard to keep a secret, and the word got out.  Chevrolet produced 201 Z-16 Chevelles -200 hardtops, and one convertible built for GM executive, Bunkie Knudsen.  Lucky Bunkie!

With about 3,400 lbs. gross, this beast was very fast and even with the conservative 375 hp rating, the power-to-weight ratio was close to 9 lbs per horsepower.  What a surprise on cruise night for the Ford guys!  The seat-of-the-pants feel is visceral when you plant the throttle and it is hard to see the road through first gear because you are pushed back in the seat with such beautiful violence!  A classic Chevy muscle car and just a taste of what was to come later in the decade of the 60’s.

Saturday, October 3, 2009

1967 Chevrolet Chevy II Nova SS


As far Chevy Muscle Cars went, the ’67 Chevy II Nova SS was a real sleeper.  It was a rattlesnake wearing a rabbit skin.  From the outside it looked like a mid-sized grocery getter but underneath it might just have the nasty L79 small block, a high-revving 327 with 350 hp and 360 ft. lbs. of torque; essentially a corvette engine in a very light car. The Super Sport edition had some extra chrome, blackout trim details, and small SS emblems. Even with the slotted wheels of the '67 disc-brake option, a Nova SS was essentially a stealth machine.

I ran across one of these rare birds one night in 1969 and got my butt handed to me; my 1969 Nova had a 350 but it just couldn’t match the power-to-weight ration of that little ’67.  He left so fast I never got close.  Ouch!  I caught up with him at a What-A-Burger and asked what in the hell was under the hood.  “Just a little 327” was all he said.  After a bit of exchanging basic BS, he lightened up and told me about the car.  Would you believe 2,700 lbs?  To put that into perspective, a new Dodge Charger weighs about twice that much.  At 350 bhp, the power-to-weight ratio was 7.7 lbs per horsepower!  I felt better knowing I had lost to such an evil little machine (I thought, “Man I got to get me one of these!”).

I have never understood why Chevy only made the body style for two years – that cost them a pretty penny in tooling cost.  I think it was an attractive, if understated, Chevy Muscle Car and is worthy of honorable mention as a pioneer in the small car/big engine performance design.  It is rare but it has such potential for a street rod.  Try to imagine how quick one could be with say a 383 stroker with 450 hp; might want to get real serious about traction!